Wood based boards are available in a large range of types, measures and if desired, provided with finishings according to application. Due to their quality and esthetic and technical properties, they are widely applied in construction,...
More information Wood based boards are available in a large range of types, measures and if desired, provided with finishings according to application. Due to their quality and esthetic and technical properties, they are widely applied in construction, interior and exterior.
Boards from sustainable managed forests, with label, are available so also from an environmentally angle, boards are a good choice. Boards are often used for facades and falsework. The load can be heavy, so it is important to process the boards in a right way and to apply it carefully. In that way, boards can be an optimal contribution to a high quality construction with a long lifetime.
Processing and finishing
A splendid result, an optimal return and a satisfied customer. That is what you get when using the right board type with the right following instructions and additional instructions like the KVT’95 and BRL0801 and 0814.
Houtwerf likes to advise you choosing the right material for your specific application.
Transport and storage:
On the building site:
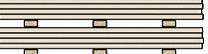 |
Fig. 1: storage of the boards on a flat surface with sufficient support. Put the bars one above the other for several packages. |
Sawing:
Istallation
Visible installation:
Nails, screws and staples are the most common fasteners.
– Use when using plate material in a humid environment or outdoor environment always stainless steel screws.
– Screws provide a high tensile strength screw holes in the plate for drilling with a diameter equal to the shank of the screw. Then, galvanise the screw head with a sovereign drill (see figure 2).
– A Torx screw may be a good option in assembly of finished plywood.
– Manual nailing be discouraged because of possible damage to the surface.
 |
Figure 2: bore screw holes in the board with a diameter equal to the shank of the screw, then with a galvanizing or sovereign drill countersink the screw head. |
Screw distances for plywood:
– Plate thickness up to 12 mm: 400 mm distance
– Corners: 15 mm from the corner.
– Edges: 10 mm from the edge.
– In the case of nails / rivets reduce the mutual distances by 50%.
Length fasteners:
Blind installation:
Finishing:
Facade application
Outside plate material is exposed to rain and sunlight (UV radiation). Because of this load, to the use of plate material to the facade needs additional instructions. This makes it possible to make a beautiful facade with a long life time. Let us advise you on the right plate for your application
Ventilation and dilitation:
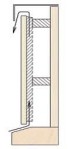 |
Fig. 3: schematic presentation of the correct way of ventilation. |
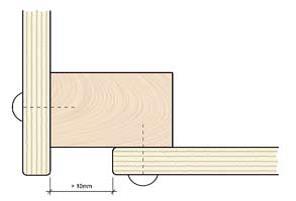 |
Fig. 4: how to execute a corner joint with enough dilatation. |
Edge finishing:
 |
Fig. 5: round the edges with min. R3, making the paint cover in equal layer thickness. |
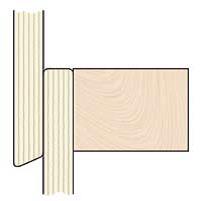 |
Fig. 6: well-executed horizontal seam with bevelled edge |
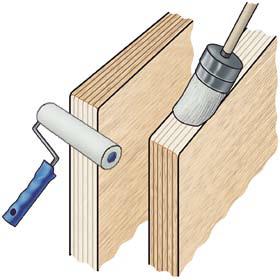 |
Fig. 7: fill possible holes (gaps) in the edges and finish with a special developed product. |
 |
Fig 8: exemple of well rounded, ventilated and dilatated plate material. |
Outside finishing:
– always finish screw hole immediately with a non-shrinking, paintable filler suitable for application.
– Follow the recommendations of the paint manufacturer
– For finishing of KOMO certified applications, the guidelines of the SKH publications 07-01 and 04-01 do apply.
 |
Fig. 9: exemplary embodiment of a roof overhang. |
 |
Fig. 10: example of application of fascias. |
Application as concrete formwork
Boards are ideally suited for concrete formwork. The required surface class, strength, a repetition factor, and any desired markings are decisive in the choice of the appropriate board. Because of the heavy load of sheet during assembly and using, concrete formwork has additional guidelines.
Support and seal:
Provide a good support that is tailored to the maximum required pressing force and deflection. Ask your supplier for the strength figures to calculate the correct support. Being careful to any differences in strength in length and width.
Apply a suitable sealant or compriband between the plates in order to prevent loss of grout.
All (cutting) edges and penetrations need at least two coats of water-resistant coating.
Assembly:
Blind screws usually give the best result. If this is not possible then:
Screws always first drilling.
Apply 2 coats of water-resistant coating on the darned holes.
When visible installation not completely sinking the screw head but keep 1 mm above the plate surface due swelling of the plate.
Screws at least 20 mm from the plate edge.
Screws at least 25 mm from the corner.
For exposed concrete class 1A and 1B screw 2 mm below plate surface and sealing components with pasta.
Nailing only at floor / table formwork (never in class 1B).
You turn to the instructions in CUR-100.
Oils and cleaning:
It is important that the shuttering boards for the 1st use are provided with a release agent.
The use of this means determines how many times the shuttering panel can be reused, and also the quality of the concrete surface.
Create the formwork immediately after unloading clean by spraying them with water and remove stubborn dirt with a spatula.
Treat the board after cleaning again with a release agent.
Damage and repair:
To prevent damage to the coating by a vibrator.
Light damage can be repaired with two components filler, although these will continue to mark in the concrete surface.
Startle Effect:
Depending on the type shuttering board may swell it after prolonged dry storage at 1st use locally (the so-called shock effect) and may leave a marking in the concrete. Therefore, choose the right formwork plate and make sure the plate in the mold has time to distribute moisture.
The above technical information for the Association of sheet section of Dutch Timber Trade Association (NTTA) in collaboration with Centrum Hout, both located in Almere.
The processing rules and guidelines are made for your convenience, you can not acquire any rights from it.


